Registering Users
In order to try out the Apiture Digital Banking APIs from the developer portal, you will need to register a user in each target environment, such as the DevBank environment or dedicated partner development or test environments. Registering a user allows you to authenticate on that environment when you select a target environment in the developer portal, and the portal saves your access token to use for secure API calls using your identity.
Visit that environment’s web portal client application (such as devbank.apiture.com) to register a new user. We recommend you register on the environment with the same email address that you used when registering on the Dev Portal (developer.apiture.com). While this is not necessary, it will be easier for you to keep track of credentials for different environments. Alternatively, some organizations may choose to create one or more shared test users and share those credentials internally. Registration also requires a valid mobile phone number and valid email address for multi-factor authentication.
The examples below show the Apiture web application registration experience
for a sample developer portal user with the email address terri.jones@example.com.
Start at devbank.apiture.com’s Welcome page.
Since you do not yet have a login account, click the Open An Account link to visit the Welcome! page.
First choose which type of account you wish to open. The products and presentation may change over time from what is shown here. Stay with Personal Banking to keep things simple. Select the account type, such as View Savings Accounts. Choose one of the options, such as Open Premier Account. View the account details and disclosures (FDIC insurance, APY, etc.) and select Open Premier Account, then read the final government mandated notices and click Ok, Sounds Good** to start the enrollment and account application.
On the Open a Premier Savings Account page, fill in the following sample data. This sample data will facilitate opening a new account using test data that does not trigger additional identity verification. Warning: Do not enter your own or anyone else’s actual social security number.
- First Name:
John - Last Name:
Smith - Address 1:
222333 Peachtree Place - Address 2: (Leave blank)
- City:
Atlanta - State:
GA - Zip Code:
30318 - Years at address:
4+ - Different Mailing Address:
No - SSN or ITIN:
112-22-3333 - Date of Birth:
02/28/1975 - I am a:
US Citizen - Mobile Phone: Enter your personal mobile number. The environment may use the phone number for multi-factor authentication on subsequent login actions. (On the next login, you can request that the environment remember the device so you do not have to complete the mobile multi-factor authentication each time you log in.)
- Email: Enter your personal email address. The target environment sends you a confirmation code at this email address to verify that the email address is valid. Tip: Use the same email address you used when registering on the developer portal.
- Employment Status:
Full Time - Occupation: choose anything from the list (except Other)
- Answer No for the questions related to Foreign Senior Political Figure
- Check the last I certify that I have reviewed the information provided above, and it is complete and accurate checkbox
When the form is complete, click the Next → button.
On the next page, enter a username such as YourFirstName.YourLastName.nnnn (add some digits to make it unique) and enter a secure password.
Check your email account for a confirmation email. Copy the code, then enter the code in the next page and click Next →.
Click I Accept on the Disclosures documents (these are intentionally empty document.)
Finally, confirm everything on the final Open an Premier Savings Account page. Select the required I have read and agree to receive all communications and disclosures provided in the E-Sign Agreement checkbox and the required I have read and agree to the Terms & Conditions checkbox. Select Yes to agree to SMS messages. When ready, click the Open My Account button.
You receive a Congratulations message:
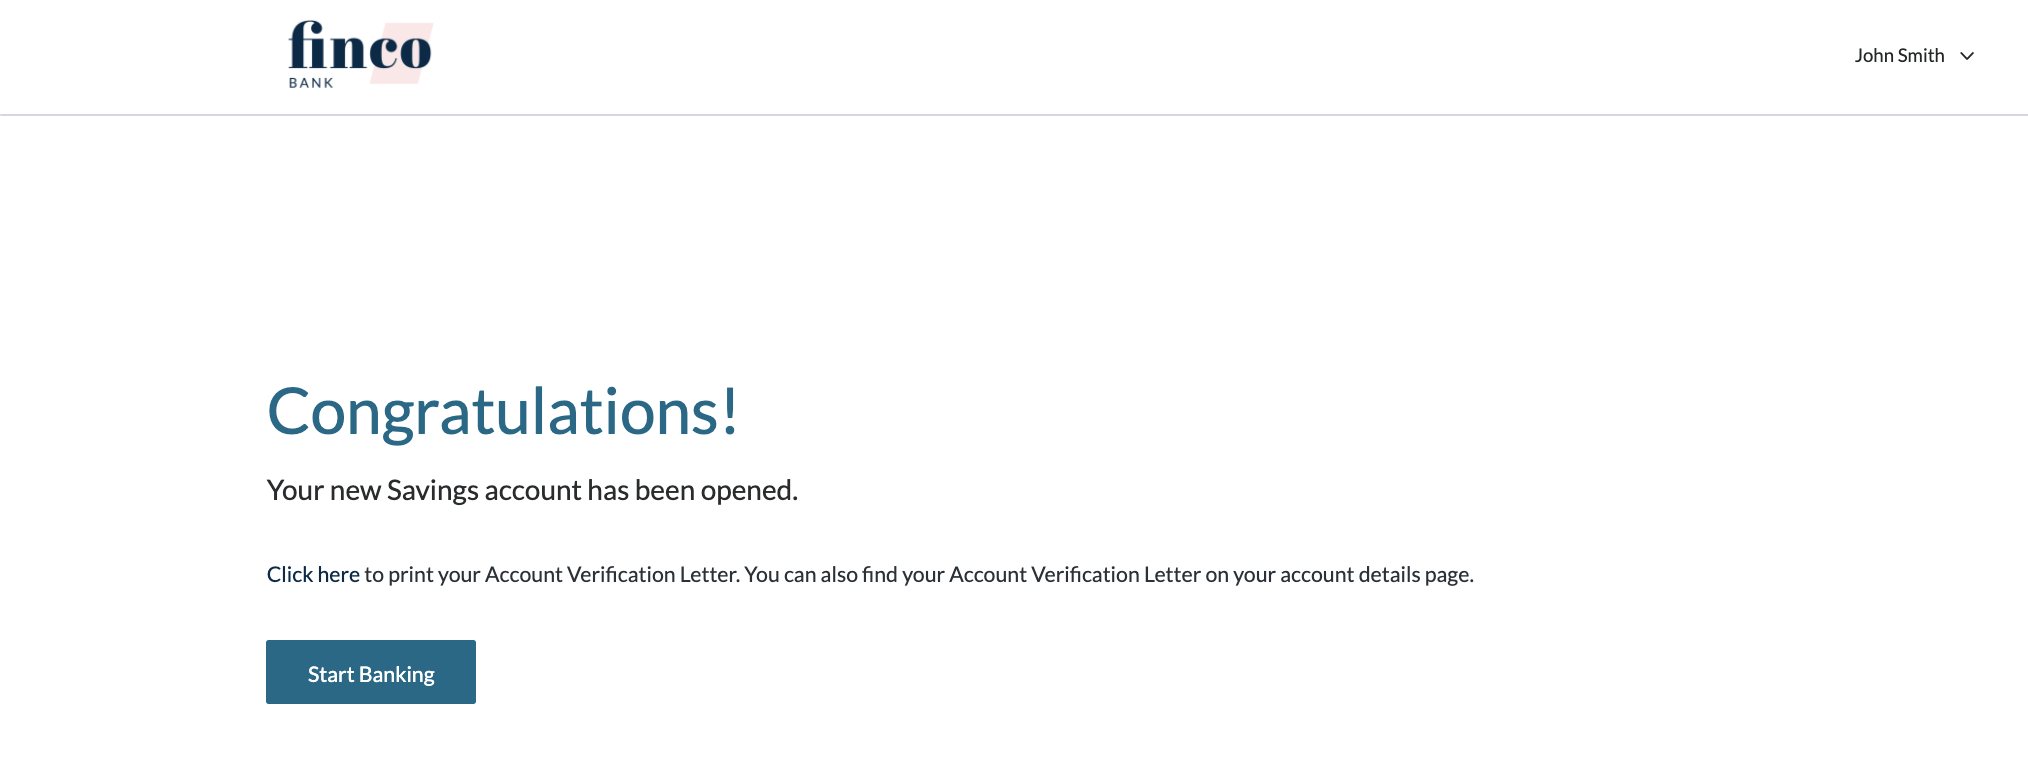
Click Start Banking to go to your account summary page.
If you wish, you can also link a (test) external account and schedule transfers to your new account from this test external account. (No transfers are actually processed in DevBank). Warning: You should not link to real accounts.
- From your account summary page, click the MOVE MONEY menu, then select Transfer Funds.
- Click the (+) VIEW/ADD EXTERNAL ACCOUNTS button and select ADD EXTERNAL ACCOUNT.
- Enter DAG in the input field and select the DAG #1 (Londi Bank) sample bank.
- Enter the username
apiture1.site16441.1and passwordsite16441.1and select Continue. Select the Platinum Checking Account and click Next. - When you get a success screen, click Close.
- You may then schedule a transfer from your external DAG #1/Platinum Checking Account to your new savings account.
- Choose a date and enter an amount and a memo,
- Click Continue.
- Review the transfer and click Confirm
- Close the confirmation.
At this point, you have completed the Digital Account Opening (DAO) process. This creates some resources in the selected target environment that you selected. You can explore those resources in the Apiture Digital Banking APIs reference. Examples of the APIs and resources containing data are:
- Accounts API lists the accounts you created and their state, API product, and other account details. This also lists any external accounts you link after DAO.
- Products API contains the sample banking products, which the DAO process uses to choose a product for a new account.
- Transfers API contains scheduled transfer that you add to fund your accounts. (Note that DevBank is not attached to a working core, so actual transfers are not processed)
- Transactions API contains your account transactions.(Note that DevBank is not attached to a working core, so actual transfers are not processed)
- Applications API contains your account application(s)
- Consents API contains an audit trail of the documents you consented to.
- Users API contains your user object
- Workflow API contains your the workflow used to manage the DAO process